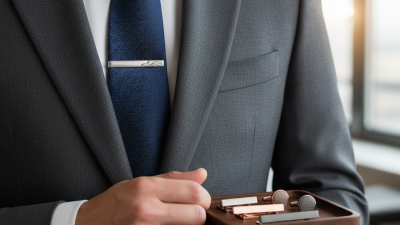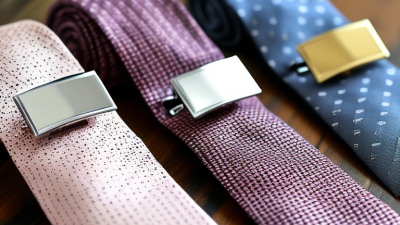
A Tie Bar may be small, but its job is practical: it keeps a tie aligned with the shirt beneath it. Without one, a tie can swing as you walk, lean over a desk, or reach for a coffee cup. With one, the two layers move together. The result should look quiet, not showy.
A Tie Bar usually slides across both the tie and the shirt placket, the fabric strip holding the buttons. Place it between the third and fourth shirt buttons, around mid-chest. Choose a bar shorter than the tie’s width. Too long, and it can look heavy; too tight, and it may pucker the fabric. A simple silver bar on a textured navy tie shows how a small detail can add order without taking over.
The mechanism is straightforward. A spring-loaded clip grips the fabric, while a slide-on bar relies on friction. Both work best when attached to the tie and shirt together. Yet fit matters: thick knit ties may resist a narrow clip, and delicate silk can crease under excessive pressure. Remove the bar before hanging the tie.
A reliable expert quotation needs a checkable source. No article or verified quotation was provided here, so attributing invented words to a named Tie Bar specialist would be misleading. A useful guide should explain the tool clearly, show its limits, and leave room for personal taste. A small detail, with a real effect.
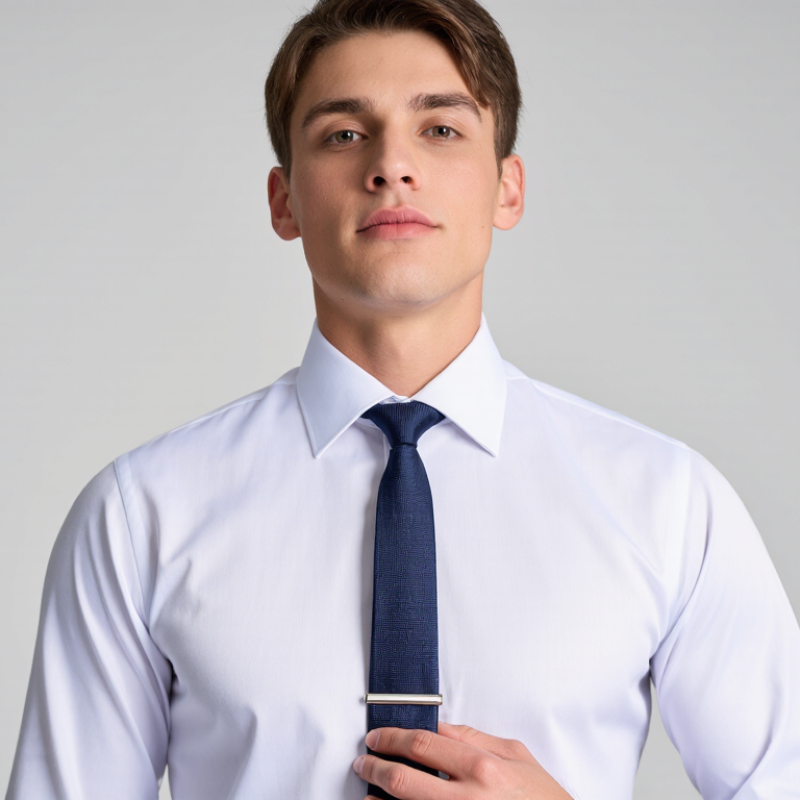
A tie bar is a small metal accessory that connects a tie to the shirt beneath it. It clips across both layers, usually between the third and fourth shirt buttons. Its practical job is simple: it keeps the tie from swinging, twisting, or falling into food. It also adds a clean horizontal line to formal clothing. That small detail can make a shirt and jacket look more controlled.
In dress, a tie bar should support the outfit, not dominate it. A slim bar suits business shirts, while a wider design can work with heavier fabric. The bar should be shorter than the tie’s width. Placing it too low looks careless, and placing it too high can feel stiff. A common mistake is treating it like decoration alone. It must hold the tie gently without leaving deep marks. I have found that a simple position often looks better than a perfectly measured one. Clothing moves, after all.
Tips: Clip the bar across the tie and shirt, not the tie alone. Keep it nearly horizontal. Match its finish with nearby accessories when possible. Test it while standing and sitting. Comfort matters. If the tie pulls sharply, loosen the clip or adjust its position. A tie bar should stay quiet, useful, and easy to forget.

A tie bar usually has a visible front piece and a fastening mechanism behind it. On a spring clip, hinged arms press the tie against the shirt placket. A slide-style bar uses tension to hold both layers together. The exact grip varies, so check that the mechanism closes smoothly and does not snag fabric. Small parts matter. A rough edge can pull threads, while an overly tight clip may leave a crease. Most bars are worn across the tie and shirt, keeping the tie from swinging forward as you move.
Common materials include stainless steel, brass, and sterling silver. Stainless steel resists everyday wear; brass is often plated to change its color or finish. Silver has a softer luster, but it can tarnish and needs occasional care. Designs range from plain polished bars to brushed, engraved, or enamel-accented styles. Some are narrow and discreet; wider versions make a stronger visual statement. Match the bar’s width to the tie rather than covering most of it. There is no perfect measurement for every fabric: a thick wool tie may need a firmer clip than a lightweight silk one, and a little trial fitting helps prevent slipping.
A tie bar is a small metal clasp that anchors a tie to the shirt beneath it. It does not merely grip the tie’s front blade. Its pressure should include the shirt placket, creating a stable three-layer hold. Slide it horizontally between the third and fourth shirt buttons, usually around the lower chest. Keep it shorter than the tie’s width. A bar that extends beyond the tie can look heavy and catch easily.
The mechanism is simple. A spring or hinged arm presses the fabric against a flat back, while friction limits vertical movement. Attach it across both tie layers and the shirt, not just the tie. This prevents the tie from swinging when you walk, bend, or reach forward.
Industry market research from Grand View Research estimates the global necktie market will continue growing through 2030, reflecting continued demand for structured formalwear. The U.S. Bureau of Labor Statistics reported average annual clothing and apparel-service spending of nearly $2,000 per consumer unit in 2022, making fabric-safe accessories worth considering.
Use gentle pressure. Too much force may crease delicate silk or pull shirt fibers. That part is easy to overlook. Check the clasp after sitting down, because body movement can shift its angle. A tie bar offers control, not perfection. Very loose shirts, slippery fabrics, or incorrectly sized bars can still allow movement. Experience matters: test the placement in a mirror, then adjust it by a few millimeters.
A tie bar is a small metal accessory that secures your tie to your shirt. It clips across both layers, preventing the tie from swinging or twisting. For a balanced look, place it between the third and fourth shirt buttons below the collar. This usually positions the bar near the middle of your chest. It should sit horizontally, not diagonally. Attach it to the shirt placket, not just the tie. Otherwise, the tie may still move.
Tips: Choose a tie bar slightly narrower than your tie. A bar covering about half to three-quarters of the tie width usually looks controlled. Keep the bar parallel to the floor. Check it while standing naturally, because posture can change its angle. Press gently when fastening it. Excessive pressure may crease delicate fabric or leave marks. Silver-toned metal often works well with cool shirt colors, while warmer metal can suit beige or brown details.
In practice, placement is not perfectly identical for every person. A taller chest, thicker tie, or unusual shirt design may require a small adjustment. I sometimes move the bar a few centimeters after looking in a mirror. Too high can make the chest look crowded. Too low can make the accessory seem disconnected. The best position feels secure but does not pull the fabric. A slight imperfection is acceptable; a visibly crooked bar usually needs correction.
A tie bar keeps your tie aligned with your shirt and reduces swinging when you move. Choose one that spans roughly half to three-quarters of your tie’s width. It should not stick out past either edge. A slim tie needs a shorter bar; a wide bar can overpower it. Simple matters.
McKinsey and Business of Fashion’s State of Fashion 2025 report says 80 percent of surveyed fashion executives expect consumers to become more price-sensitive. That finding favors a versatile, well-made tie bar over a novelty piece you may rarely wear. Consider your usual wardrobe: a restrained silver-tone bar works with many cool-toned outfits, while warm metals can complement brown or cream. These are useful cues, not strict rules.
Wear the bar between your shirt’s third and fourth buttons, fastening both the tie and shirt placket. Keep it horizontal. Check that it holds the fabric without pulling or creasing it; delicate silk may need a gentler clip. I sometimes see bars placed too high, where they feel decorative rather than useful. Stand, sit, and move before leaving. A small shift is normal. Don’t fuss over it.